In the realm of automotive journeys, the role of a car radio extends beyond mere functionality; it contributes to the overall ambiance, transforming routine drives into enjoyable experiences. The familiar tunes emanating from the speakers create a comforting backdrop, making the car interior a personalized space. While a car radio typically comes as part of a vehicle’s standard equipment, there are instances where reinstallation becomes necessary. In this guide, we unravel the seemingly complex process of connecting a car radio, demonstrating that the task is more straightforward than it appears. Whether navigating the integrated systems of modern vehicles or working with older car models, mastering the art of connecting a car radio involves understanding key steps and avoiding common pitfalls. Join us on this exploration to demystify the process, empowering car enthusiasts to enhance their driving experiences with the perfect soundtrack.
Installing a Car Radio:
The installation of a car radio, though it may seem daunting at first glance, is a manageable task when approached with patience and a systematic understanding of the process. The complexity of the installation largely depends on the existing features and technology integrated into the vehicle.
- Assessing the requirements:
In some cases, a car may lack essential components such as speakers, wiring, or an antenna. Addressing these fundamental needs involves running cables and connecting speakers, necessitating the removal of upholstery and flooring. Care must be taken during this phase to avoid inadvertent damage to the car’s interior. - Creating Speaker Holes:
If space for speakers is limited or if new ones are being added, careful creation of appropriate holes becomes crucial. Precision is key to avoid damage to the car’s upholstery during this process. Ensuring that electric cables lead to the battery and sound cables connect to the speakers is essential. - Determining Radio Fit:
Car radios typically have designated spaces in the vehicle. Understanding whether a 2DIN or 4DIN device fits is important, with 2DIN radios being more prevalent. Before inserting the receiver, cables must be routed to the designated location. This step can be challenging, particularly when concealing cables behind the dashboard, requiring meticulous attention to prevent damage to the car’s electrical system. - Connecting Wires:
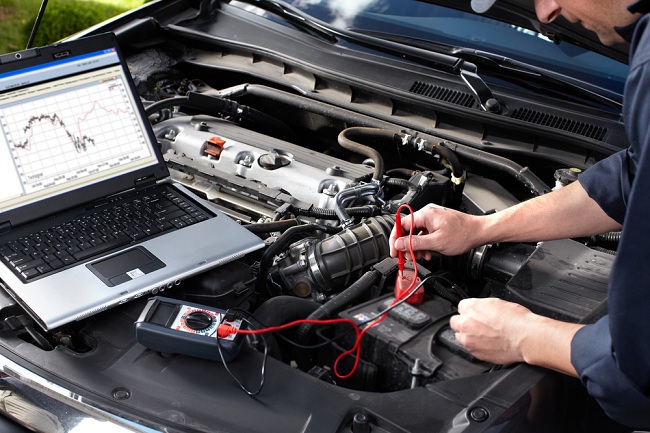
Once the wires are routed, connecting them to the appropriate plugs is the next step. It is crucial to remember the correct placement of each plug on the radio. A voltage check should be performed using a current test tube. If successful, plug the receiver in and test its functionality. This involves verifying power and sound plugs, installing an antenna, and connecting cables for external devices like amplifiers or phones. - Caution and Verification:
While the process is straightforward, it is essential to proceed calmly, avoiding any confusion with wires. The use of appropriate insulation, such as heat shrink bands, is recommended. Before finalizing the installation, a thorough check ensures that all connections are secure, minimizing the risk of issues post-installation.
In essence, the installation of a car radio involves a series of systematic steps, and attention to detail is paramount to ensure a seamless integration that enhances the in-car audio experience.
Connecting a Car Radio:
Connecting a car radio involves several critical steps to ensure proper and functional integration into the vehicle’s audio system. Here’s a detailed exploration of the key aspects:
- Routing Cables:
Before connecting the car radio, it is crucial to route the necessary cables to their designated locations. This includes power cables, sound cables, and any additional cables for external devices. Care should be taken during this phase to avoid damaging the car’s interior or electrical system. - Identifying Power and Sound Plugs:
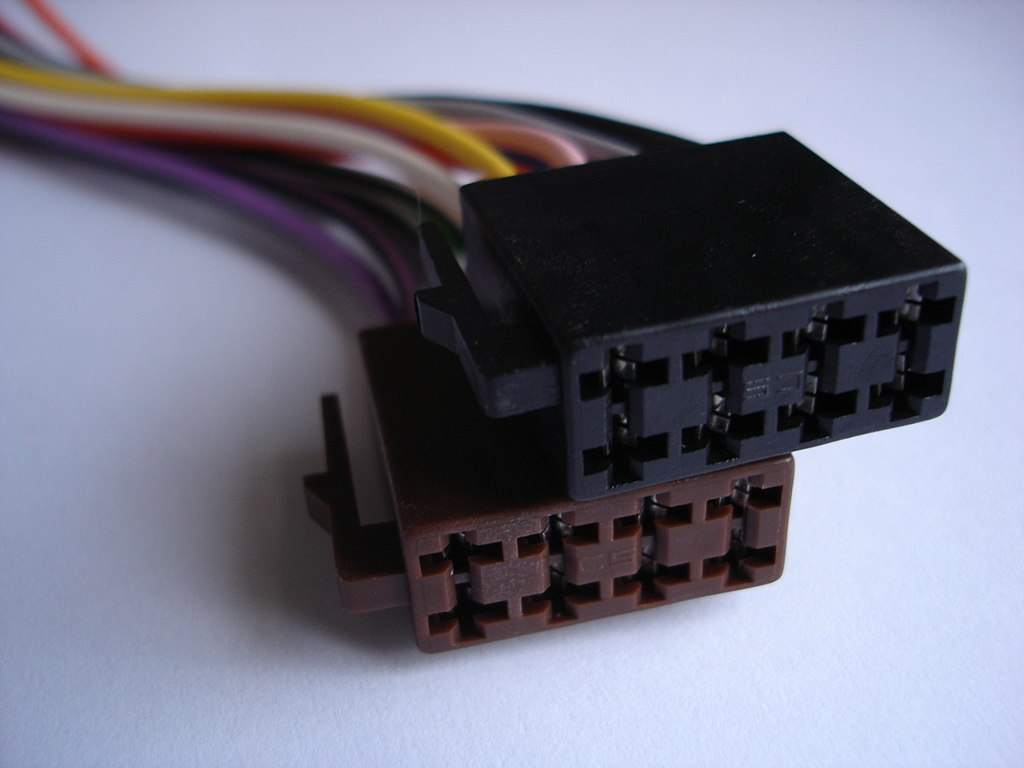
Car radios typically come with standard power and sound plugs, such as 2DIN or 4DIN connectors. Prior to inserting the receiver, it’s essential to confirm whether the device fits the designated space in the vehicle. Understanding the type of plugs and their correct placement is crucial for a successful connection. - Voltage Check:
Before connecting the wires, perform a voltage check using a current test tube. This step ensures that there is a proper power supply to the radio. Identifying any issues at this stage can prevent potential malfunctions after the installation is complete. - Plugging In the Receiver:
Once the cables are routed and checked, connect them to the corresponding plugs on the car radio. It’s essential to pay attention to the correct placement of each plug to avoid confusion. After the connections are secure, attempt to turn on the radio to verify that both power and sound are functioning correctly. - Installing an Antenna:
Alongside power and sound connections, it’s crucial to install the antenna for optimal radio reception. The antenna connection may vary based on the type of vehicle and radio, so consulting the respective manuals is advisable. - Connecting External Devices:
If there are additional devices to be connected, such as amplifiers or smartphones, ensure that the corresponding cables are connected securely. This step contributes to expanding the functionality of the car audio system. - Verification and Testing:
Before finalizing the installation, conduct a comprehensive verification of all connections. This includes checking the insulation of wires, confirming the secure attachment of plugs, and ensuring that all components are in their designated places. Test the radio’s functionality by turning it on and checking various features.
Connecting a car radio demands meticulous attention to detail to prevent issues and malfunctions. Following these steps ensures a successful integration, providing an enhanced audio experience during car journeys.
Car Radio Installation Process:
The installation process of a car radio involves various steps, from preparing the vehicle to connecting the audio components. A systematic approach ensures a successful integration of the radio into the car’s audio system. Here’s an in-depth exploration of the installation process:
- Preparation of the Vehicle:
Before initiating the installation, ensure that the vehicle is in a suitable location for the procedure. Preferably, perform the installation in a garage or a designated car pit to prevent any environmental hazards or damage to the vehicle. - Checking Existing Components:
Assess the current state of the car’s audio system. Identify whether there are speakers, wiring, or an antenna in place. This evaluation guides the subsequent steps in connecting the new car radio. - Running Cables and Connecting Speakers:
In cases where speakers, wiring, or an antenna are absent, the fundamental activity involves running cables and connecting speakers. Carefully remove upholstery and floor panels to avoid damage during installation. Create appropriate holes for speakers, ensuring precision to protect the car’s interior. - Selecting the Right Radio Type:
Determine whether a 2DIN or 4DIN radio is suitable for the car. These refer to standard power and sound plugs. The choice depends on the available space and compatibility with the vehicle’s design. - Routing Cables to the Dashboard:
Route the required cables to the dashboard, taking into account the placement of the car radio. This phase requires precision to conceal the cables behind the dashboard without damaging the car’s electrical system. - Identifying Plug Types:
Different car radios come with specific plug types. Identify the power and sound plugs, ensuring that they match the connectors in the vehicle. This step prevents compatibility issues during the installation. - Voltage Check and Testing:
Before connecting the wires, conduct a voltage check using a current test tube. This ensures that there is a consistent power supply. Once the cables are connected, perform a preliminary test to check whether the radio functions correctly. - Connecting External Devices:
If there are external devices like amplifiers or smartphones to be integrated, connect their respective cables securely. This step expands the capabilities of the car audio system. - Installing the Antenna:
Install the antenna for optimal radio reception. The type of antenna connection may vary, so refer to the manuals for specific instructions. - Final Verification and Testing:
Thoroughly check all connections, including insulation and plug attachments. Test the car radio’s features, such as sound quality, radio reception, and compatibility with external devices. Address any issues promptly to ensure a seamless installation.
Following this comprehensive process guarantees a successful car radio installation, enhancing the overall audio experience for a more enjoyable drive.
How to Connect a Car Radio at Home:
Connecting a car radio at home can be a convenient way to test its functionality before installation in the vehicle. The process involves a few simple steps using readily available materials. Here’s a detailed expansion of how to connect a car radio at home:
- Gathering Materials:
Collect the necessary materials, including an old speaker, a power supply (preferably a computer power supply), and the car radio you intend to install. Ensure you have basic electrical tools for the installation process. - Understanding Wire Functions:
Familiarize yourself with the wire functions of the car radio. Typically, the yellow wire is for power, the black one is ground, and the red and green wires are motherboard power wires that need to be short-circuited. - Connecting Ground and Power Wires:
Start by connecting the ground wire (black) from the car radio to the black wire of the speaker. This establishes the ground connection. Then, connect the yellow wire (power) of the car radio to both the yellow and red wires in the radio receiver. - Connecting Speakers:
Connect the speakers to the designated places on the car radio. Ensure a secure connection to prevent any audio issues during testing. - Power Supply Connection:
Connect the power supply to the car radio. Use the power supply’s appropriate connectors and turn it on. This step simulates the power conditions the car radio will experience in the vehicle. - Testing the Radio:
Turn on the car radio and assess its functionality. Check for audio output from the connected speaker. This preliminary test helps identify any issues with the radio’s basic features. - Verifying Power and Sound Output:
During the test, verify that the power supply is providing a stable power source. Additionally, ensure that the sound output is clear and free from distortion. - Ensuring Proper Functionality:
Confirm that all essential functions of the car radio are working correctly, including volume control, station tuning, and any other features specific to the model. - Troubleshooting if necessary:
If any issues arise during the test, troubleshoot by checking connections, wire integrity, and power supply stability. Addressing problems at this stage ensures a smoother installation in the car. - Finalizing for Vehicle Installation:
Once the car radio proves to be in working order, it can be confidently installed in the vehicle. This pre-testing process at home minimizes the risk of discovering issues after the installation is complete.
Connecting a car radio at home provides a practical way to ensure its functionality before the final installation in the vehicle, offering a smooth and efficient audio integration process.
Conclusion:
Connecting a car radio, whether in a workshop or at home, is a task that can be accomplished with careful consideration and adherence to proper procedures. The installation process involves understanding the intricacies of the vehicle’s electrical system, routing cables, and making secure connections to ensure optimal performance.
Whether dealing with a fully integrated system in modern vehicles or a more straightforward setup in older cars, the importance of patience during the process cannot be overstated. Avoiding common pitfalls such as mixing up wires and damaging vehicle components is crucial for a successful installation.
For those opting to connect a car radio at home, the pre-testing procedure provides a valuable opportunity to identify and address potential issues before the final installation in the vehicle. This proactive approach minimizes the likelihood of complications and ensures a smooth and enjoyable audio experience on the road.
In essence, connecting a car radio is not as daunting as it may initially seem. With a basic understanding of the wiring, careful routing of cables, and attention to detail, both novices and experienced individuals can successfully integrate a car radio, enhancing the overall driving experience with personalized and enjoyable music.

